

How To Install Apache Tomcat 6
 Apache Tomcat is an open source Java server.
Yous need Tomcat when you want to deploy and execute a Java application that is written in whatsoever of the Coffee technologies including Coffee Servlet, JSP, etc.
This tutorial explains how to install the latest Apache Tomcat version 9.x on Linux platform
Pre-req: Install Java 8
For Apache Tomcat nine to be installed and configured properly, you need to have Coffee version 8 installed on your system.
To verify the java version on your arrangement, execute the post-obit.
$ java -version java version "1.8.0_131" Coffee(TM) SE Runtime Surround (build 1.eight.0_131-b11) Java HotSpot(TM) 64-Bit Server VM (build 25.131-b11, mixed fashion)
If y'all don't take Java JRE 8 installed, then follow these steps: How to Install Coffee 8 JRE on Linux
Create tomcat User
Offset, as root, create a user called tomcat and assign a password as shown beneath.
adduser tomcat passwd tomcat
Next, su to this newly created tomcat user.
su - tomcat
Download Apache Tomcat 9
Get to Apache Tomcat 9 Download page.
Under Cadre, click on "tar.gz" link to download the tar.gz version of the latest tomcat.
In this example, we are downloading this file: apache-tomcat-nine.0.0.M21.tar.gz
Install Apache Tomcat
Kickoff, untar the tar.gz file every bit shown beneath using tar command
tar xvfz apache-tomcat-9.0.0.M21.tar.gz
This will create a directory apache-tomcat with the version number in it. cd to this new directory.
cd apache-tomcat-9.0.0.M21
Apache Tomcat 9 Directories
You'll see the following files and directories under this apache-tomcat directory.
$ ls -altr drwxr-x---. 2 tomcat tomcat half-dozen May 4 22:42 piece of work drwxr-ten---. 2 tomcat tomcat 6 May four 22:42 logs drwxr-x---. 7 tomcat tomcat 76 May four 22:43 webapps -rw-r-----. 1 tomcat tomcat 15946 May 4 22:45 RUNNING.txt -rw-r-----. 1 tomcat tomcat 6709 May iv 22:45 RELEASE-NOTES -rw-r-----. 1 tomcat tomcat 1804 May 4 22:45 NOTICE -rw-r-----. 1 tomcat tomcat 57092 May four 22:45 LICENSE drwx------. 2 tomcat tomcat 4096 May 4 22:45 conf drwxr-10---. 2 tomcat tomcat 29 Jun 1 17:25 temp drwxr-10---. 2 tomcat tomcat 4096 Jun one 17:25 lib drwxr-10---. 2 tomcat tomcat 4096 Jun i 17:25 bin
In the above:
- bin – This contains all the binary files and trounce scripts required to beginning the tomcat, set the environment variables, etc.
- conf – This is the tomcat configuration directory where all the config files are located. The main tomcat server config file is server.xml which is located under this directory.
- lib – Contains library files and classes that are required for the tomcat server
- logs – Contains the log and output files of tomcat (i.e catalina.out, etc.)
- webapps – This is where you'll deploy your java web awarding. Any application deployed nether this directory volition be automatically loaded by the Apache tomcat. For case, you can deploy birt-viewer on tomcat.
- work – This is used as a temp working directory for your web apps.
- temp – This is used by the JVM, which volition create any required temp files that are specified by java.io.tmpdir.
Set Apache Tomcat CATALINA_HOME
The home surround variable that is used inside the Apache tomcat script is called equally CATALINA_HOME.
Catalina refers to Tomcat.
Gear up this variable to the full directory of the apache tomcat that we extracted before as shown below.
export CATALINA_HOME=/home/tomcat/apache-tomcat-9.0.0.M21
Apart from setting information technology on the control line, make sure you add together the above line to tomcat's bash_profile too every bit shown below. This volition make sure this variable is set every fourth dimension yous login as tomcat user.
$ vi ~/.bash_profile consign CATALINA_HOME=/home/tomcat/apache-tomcat-9.0.0.M21
Log-out and login as tomcat user to verify that this environment variable is set properly.
$ set up | grep CATALINA CATALINA_HOME=/home/tomcat/apache-tomcat-9.0.0.M21
Startup Apache Tomcat
To beginning Apache tomcat, we'll use the script chosen catalina.sh that is located in the bin directory of CATALINA_HOME.
So, execute catalina.sh outset equally shown below to beginning Apache tomcat on your system.
$ $CATALINA_HOME/bin/catalina.sh kickoff
Apply grep command to verify whether the tomcat java procedure is started and running in the background as shown below.
$ ps -ef | grep -i tomcat root 3412 2045 0 17:27 pts/0 00:00:00 su - tomcat tomcat 3413 3412 0 17:27 pts/0 00:00:00 -bash tomcat 3463 i 1 17:30 pts/0 00:00:02 //bin/java -Djava.util.logging.config.file=/home/tomcat/apache-tomcat-9.0.0.M21/conf/logging.backdrop -Djava.util.logging.director=org.apache.juli.ClassLoaderLogManager -Djdk.tls.ephemeralDHKeySize=2048 -Djava.protocol.handler.pkgs=org.apache.catalina.webresources -classpath /habitation/tomcat/apache-tomcat-ix.0.0.M21/bin/bootstrap.jar:/home/tomcat/apache-tomcat-9.0.0.M21/bin/tomcat-juli.jar -Dcatalina.base=/home/tomcat/apache-tomcat-9.0.0.M21 -Dcatalina.habitation=/home/tomcat/apache-tomcat-nine.0.0.M21 -Djava.io.tmpdir=/dwelling/tomcat/apache-tomcat-ix.0.0.M21/temp org.apache.catalina.startup.Bootstrap start
Note: If information technology didn't start, and then you might accept to set the JAVA_HOME location properly as shown below.
View Tomcat Log files
On the Tomcat is started, you lot can view the log files to make certain whether tomcat started properly. This volition too tell you lot whether all your web applications are deployed without any issues.
The log file is catalina.out as shown below. This shows partial output of catalina.out
cd $CATALINA_HOME/logs $ more catalina.out This is the partial output from the tiptop of the catalina.out file. All of these line start with timestamp followed by "INFO [main] org.apache.catalina.startup.VersionLoggerListener.log", which is not shown hither. $ more catalina.out Server version: Apache Tomcat/9.0.0.M21 Server built: May four 2022 22:42:36 UTC Server number: ix.0.0.0 OS Name: Linux OS Version: iii.x.0-327.10.ane.el7.x86_64 Architecture: amd64 Java Home: /usr/java/jre1.8.0_131 JVM Version: i.viii.0_131-b11 JVM Vendor: Oracle Corporation CATALINA_BASE: /home/tomcat/apache-tomcat-9.0.0.M21 CATALINA_HOME: /home/tomcat/apache-tomcat-ix.0.0.M21
The following is the concluding few lines of the above catalina.out log file where it shows that the tomcat server started properly without whatsoever issues.
INFO [main] org.apache.catalina.startup.HostConfig.deployDirectory Deployment of web application directory [/home/tomcat/apache-tomcat-ix.0.0.M21/webapps/managing director] has finished in [xviii] ms INFO [main] org.apache.coyote.AbstractProtocol.commencement Starting ProtocolHandler ["http-nio-8080"] INFO [main] org.apache.coyote.AbstractProtocol.start Starting ProtocolHandler ["ajp-nio-8009"] INFO [primary] org.apache.catalina.startup.Catalina.showtime Server startup in 18181 ms
Stop Apache Tomcat
To sop the Apache Tomcat, use the same catalina.sh script with finish parameter as shown below.
$ $CATALINA_HOME/bin/catalina.sh end Using CATALINA_BASE: /home/tomcat/apache-tomcat-9.0.0.M21 Using CATALINA_HOME: /home/tomcat/apache-tomcat-ix.0.0.M21 Using CATALINA_TMPDIR: /home/tomcat/apache-tomcat-9.0.0.M21/temp Using JRE_HOME: / Using CLASSPATH: /home/tomcat/apache-tomcat-9.0.0.M21/bin/bootstrap.jar:/home/tomcat/apache-tomcat-9.0.0.M21/bin/tomcat-juli.jar
Later "catalina.sh stop", y'all will not see any java tomcat process running in the background as shown below.
$ ps -ef | grep -i tomcat root 3412 2045 0 17:27 pts/0 00:00:00 su - tomcat tomcat 3413 3412 0 17:27 pts/0 00:00:00 -bash tomcat 3592 3413 0 17:42 pts/0 00:00:00 ps -ef tomcat 3593 3413 0 17:42 pts/0 00:00:00 grep --color=auto -i tomcat
Instead of using the catalina.sh script, you lot can also utilise the shutdown.sh script as shown below. This does the same thing.
$ $CATALINA_HOME/bin/shutdown.sh
The post-obit is the output from catalina.out log file which shows that the tomcat server is properly shutdown without any bug. All of these lines start with a timestamp at the beginning, which is not shown here.
INFO [chief] org.apache.catalina.cadre.StandardServer.await A valid shutdown control was received via the shutdown port. Stopping the Server instance. INFO [main] org.apache.coyote.AbstractProtocol.pause Pausing ProtocolHandler ["http-nio-8080"] INFO [main] org.apache.coyote.AbstractProtocol.interruption Pausing ProtocolHandler ["ajp-nio-8009"] INFO [principal] org.apache.catalina.cadre.StandardService.stopInternal Stopping service [Catalina] INFO [main] org.apache.coyote.AbstractProtocol.finish Stopping ProtocolHandler ["http-nio-8080"] INFO [primary] org.apache.coyote.AbstractProtocol.stop Stopping ProtocolHandler ["ajp-nio-8009"] INFO [main] org.apache.coyote.AbstractProtocol.destroy Destroying ProtocolHandler ["http-nio-8080"] INFO [primary] org.apache.coyote.AbstractProtocol.destroy Destroying ProtocolHandler ["ajp-nio-8009"]
JAVA_HOME and JRE_HOME Env Variable
Information technology is of import to understand how these two surroundings variable will affect your Apache Tomcat:
If you have multiple Java installed on your system, then you may want Apache tomcat to use a specific version of Java instead of the default version.
For this you demand to prepare either your JRE_HOME or JAVA_HOME appropriately.
JRE_HOME – This is for Java Runtime Environment. Use this environs variable to specify the location of the Coffee JRE eight on your system.
JAVA_HOME – This is for Java Development Kit. Use this to specify the location of Java JDK eight on your system.
If you have JDK installed, it is best to utilize JAVA_HOME, as this will requite you boosted startup options that are not immune when you apply only JRE.
For some reason, if you've set up both JRE_HOME and JAVA_HOME, then tomcat will use JRE_HOME during startup.
The best fashion to specify these environs variable is in your setenv.sh script which is located under $CATALINA_HOME/bin directory.
Add your JAVA_HOME environment variable to the setenv.sh file equally shown below.
$ cd $CATALINA_HOME/bin $ vi setenv.sh JAVA_HOME=/usr/java/jdk1.8.0_131
Now when you lot start Tomcat every bit shown below, you can encounter that information technology is using the JAVA_HOME environment's value to beginning the tomcat.
$ $CATALINA_HOME/bin/catalina.sh start Using CATALINA_BASE: /dwelling house/tomcat/apache-tomcat-nine.0.0.M21 Using CATALINA_HOME: /abode/tomcat/apache-tomcat-9.0.0.M21 Using CATALINA_TMPDIR: /home/tomcat/apache-tomcat-9.0.0.M21/temp Using JRE_HOME: /usr/java/jdk1.8.0_131 Using CLASSPATH: /domicile/tomcat/apache-tomcat-9.0.0.M21/bin/bootstrap.jar:/home/tomcat/apache-tomcat-9.0.0.M21/bin/tomcat-juli.jar Tomcat started.
Note: Eventhough it says JRE_HOME in the above output, notice how the value of this is actually the value of JAVA_HOME that we set in the setenv.sh file.
Likewise, from the catalina.out log file, you'll see the following during startup, which confirms that this is using this new value that we gear up.
INFO [main] org.apache.catalina.startup.VersionLoggerListener.log Java Dwelling house: /usr/java/jdk1.viii.0_131/jre
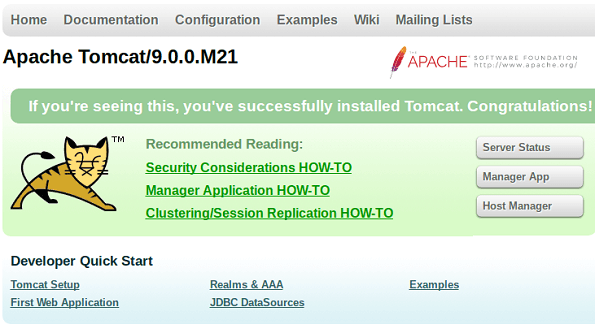
Apache Tomcat UI – Default Home Page
When everything is upward and running, you lot should be able to go to the following URL To view the tomcat dwelling house page.
http://{your-ip-address}:8080 By default, Apache tomcat is installed to run on port 8080.
If y'all already have some other application on your organization that is running on port 8080, so you can change this by modifying this port value from 8080 to something else in the post-obit server.xml file:
vi $CATALINA_HOME/conf/server.xml
The following is the default Apache Tomcat home page after installation.

Source: https://www.thegeekstuff.com/2017/06/install-tomcat-linux/
Posted by: bolenuncloyesseen.blogspot.com
0 Response to "How To Install Apache Tomcat 6"
Post a Comment